 Bicamly
BICAMLY / IPHONE
How to create a picture-in-picture video on iPhone
Create a Bicamly template with a small inset view, then adjust its position, size, shape, and border before recording.
Show me where to tap ↓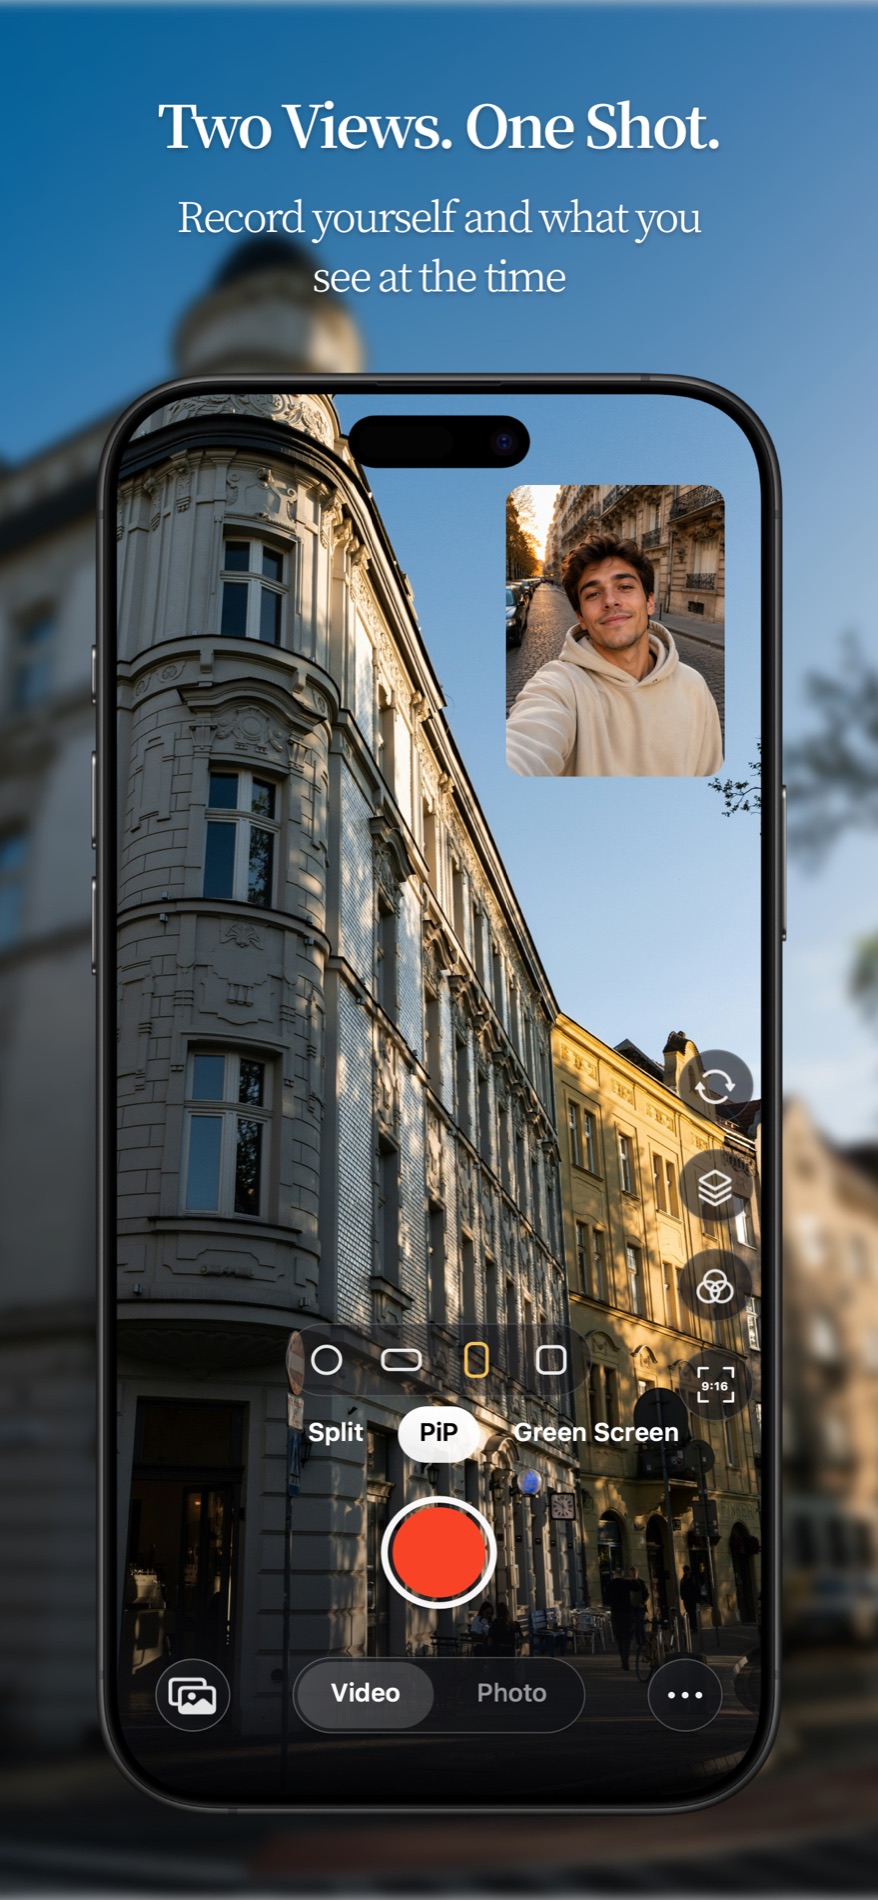
Follow the highlighted icons
Real app interface captured in a simulator with demo photos. Screenshots show the Chinese interface; numbered callouts explain each control in English. Positions may vary with screen size and app version.
STEP 01
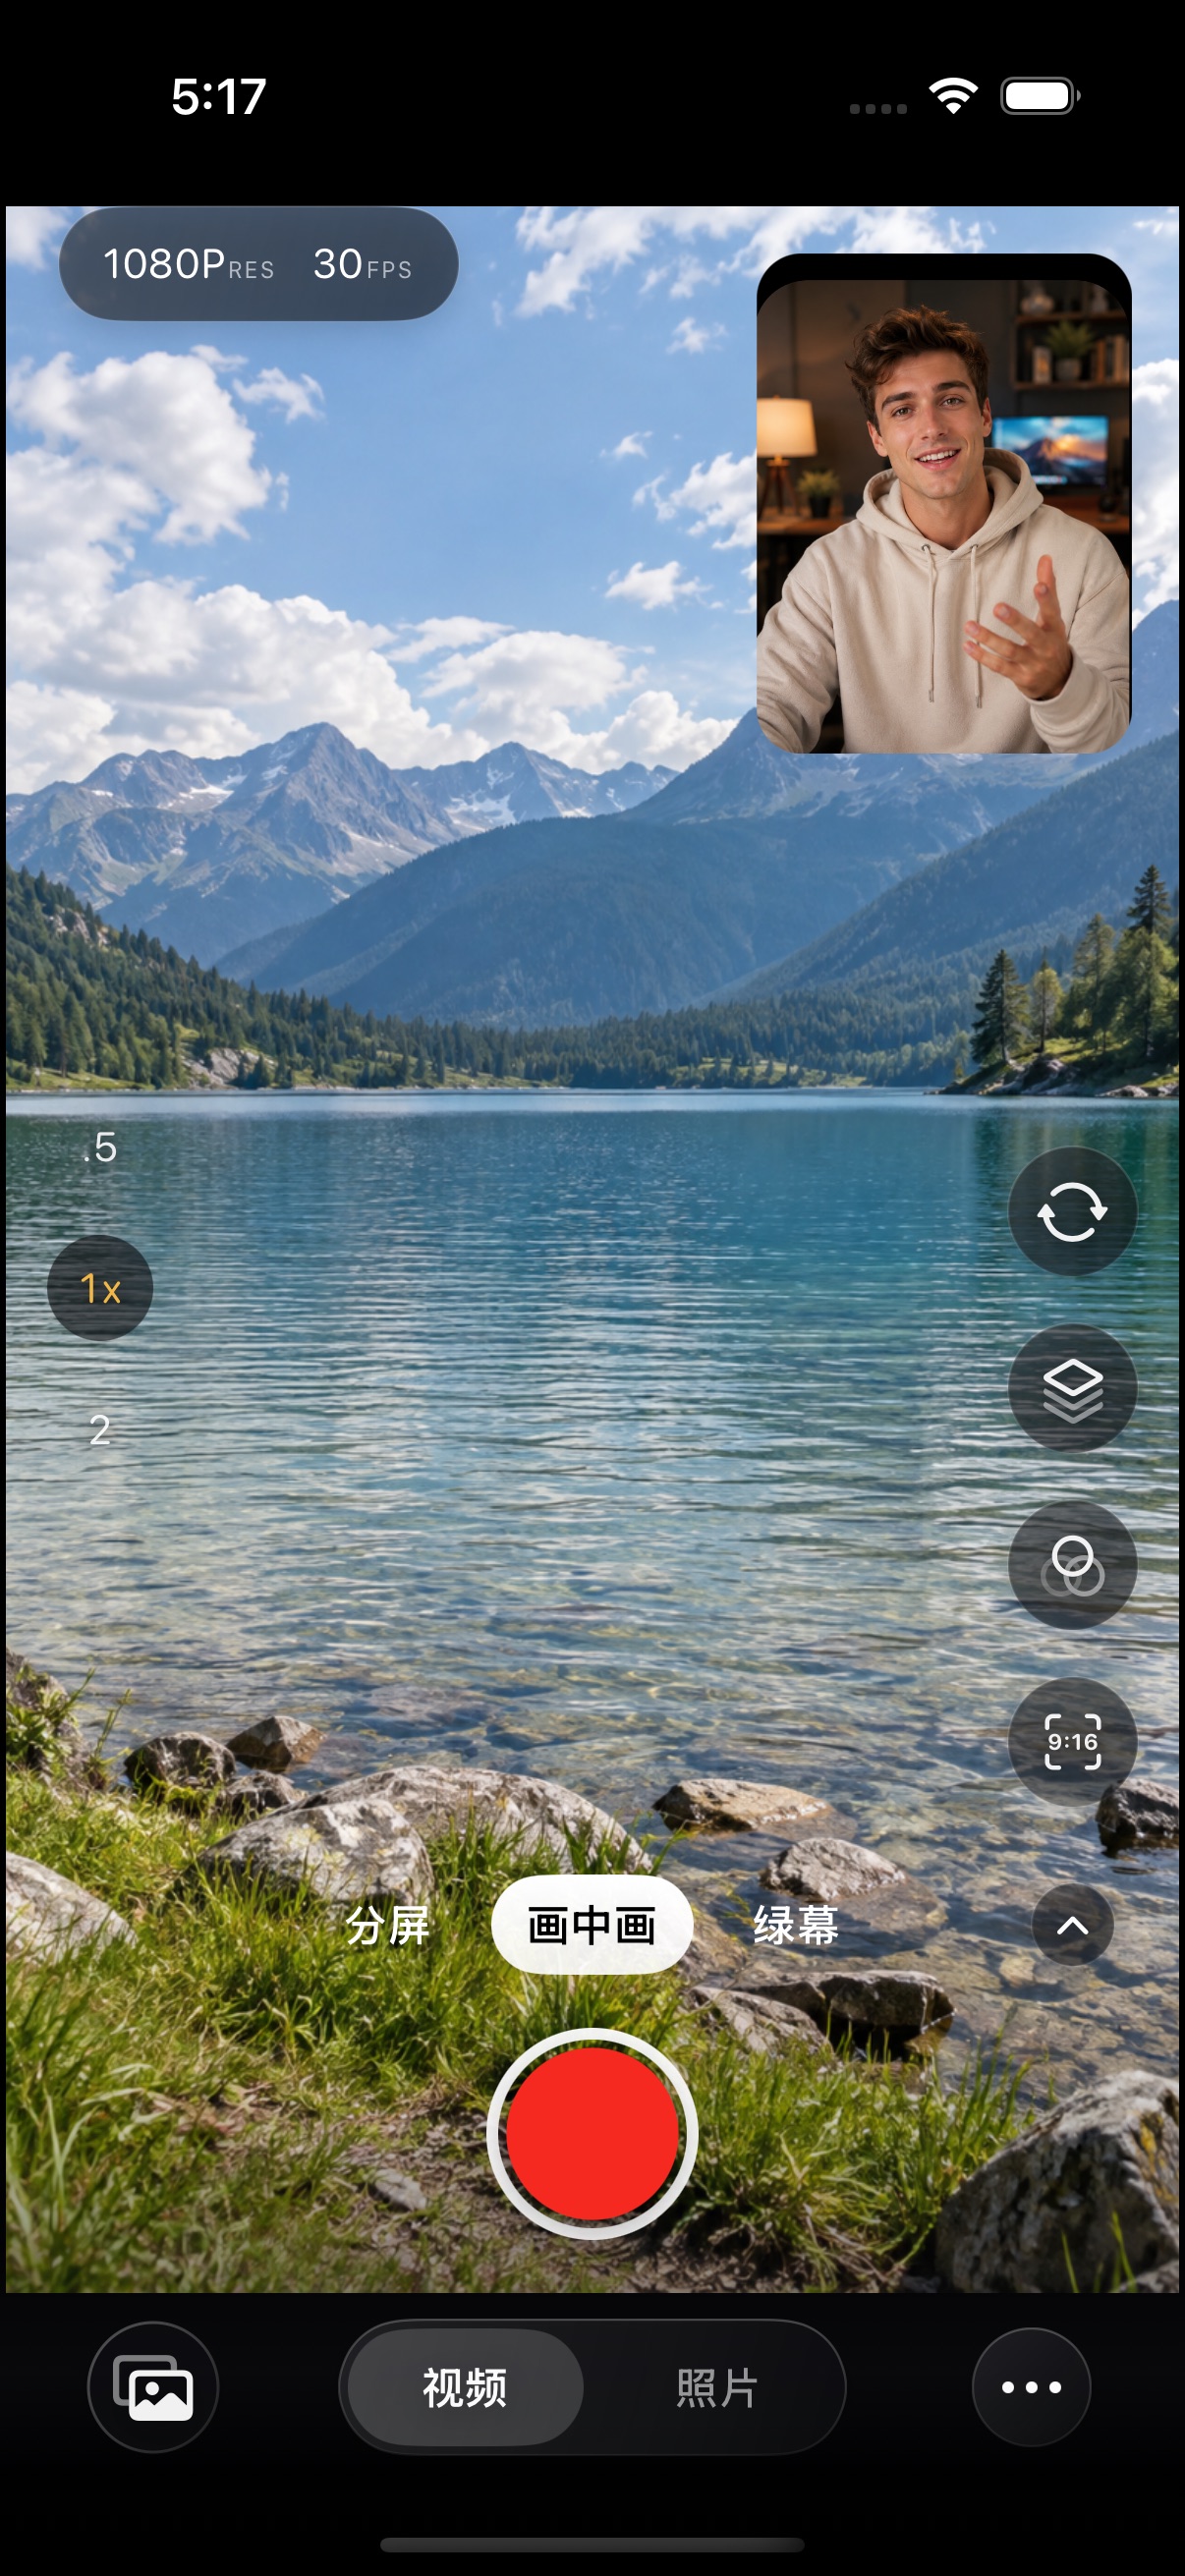
Find the stacked-layers icon on the right
Tap the three stacked layers to open My Templates. If the toolbar is collapsed, expand it using its small upward arrow. The circular arrows above it swap the camera views.
- 1 Stacked layers: templates
Open full-size screenshot ↗ STEP 02
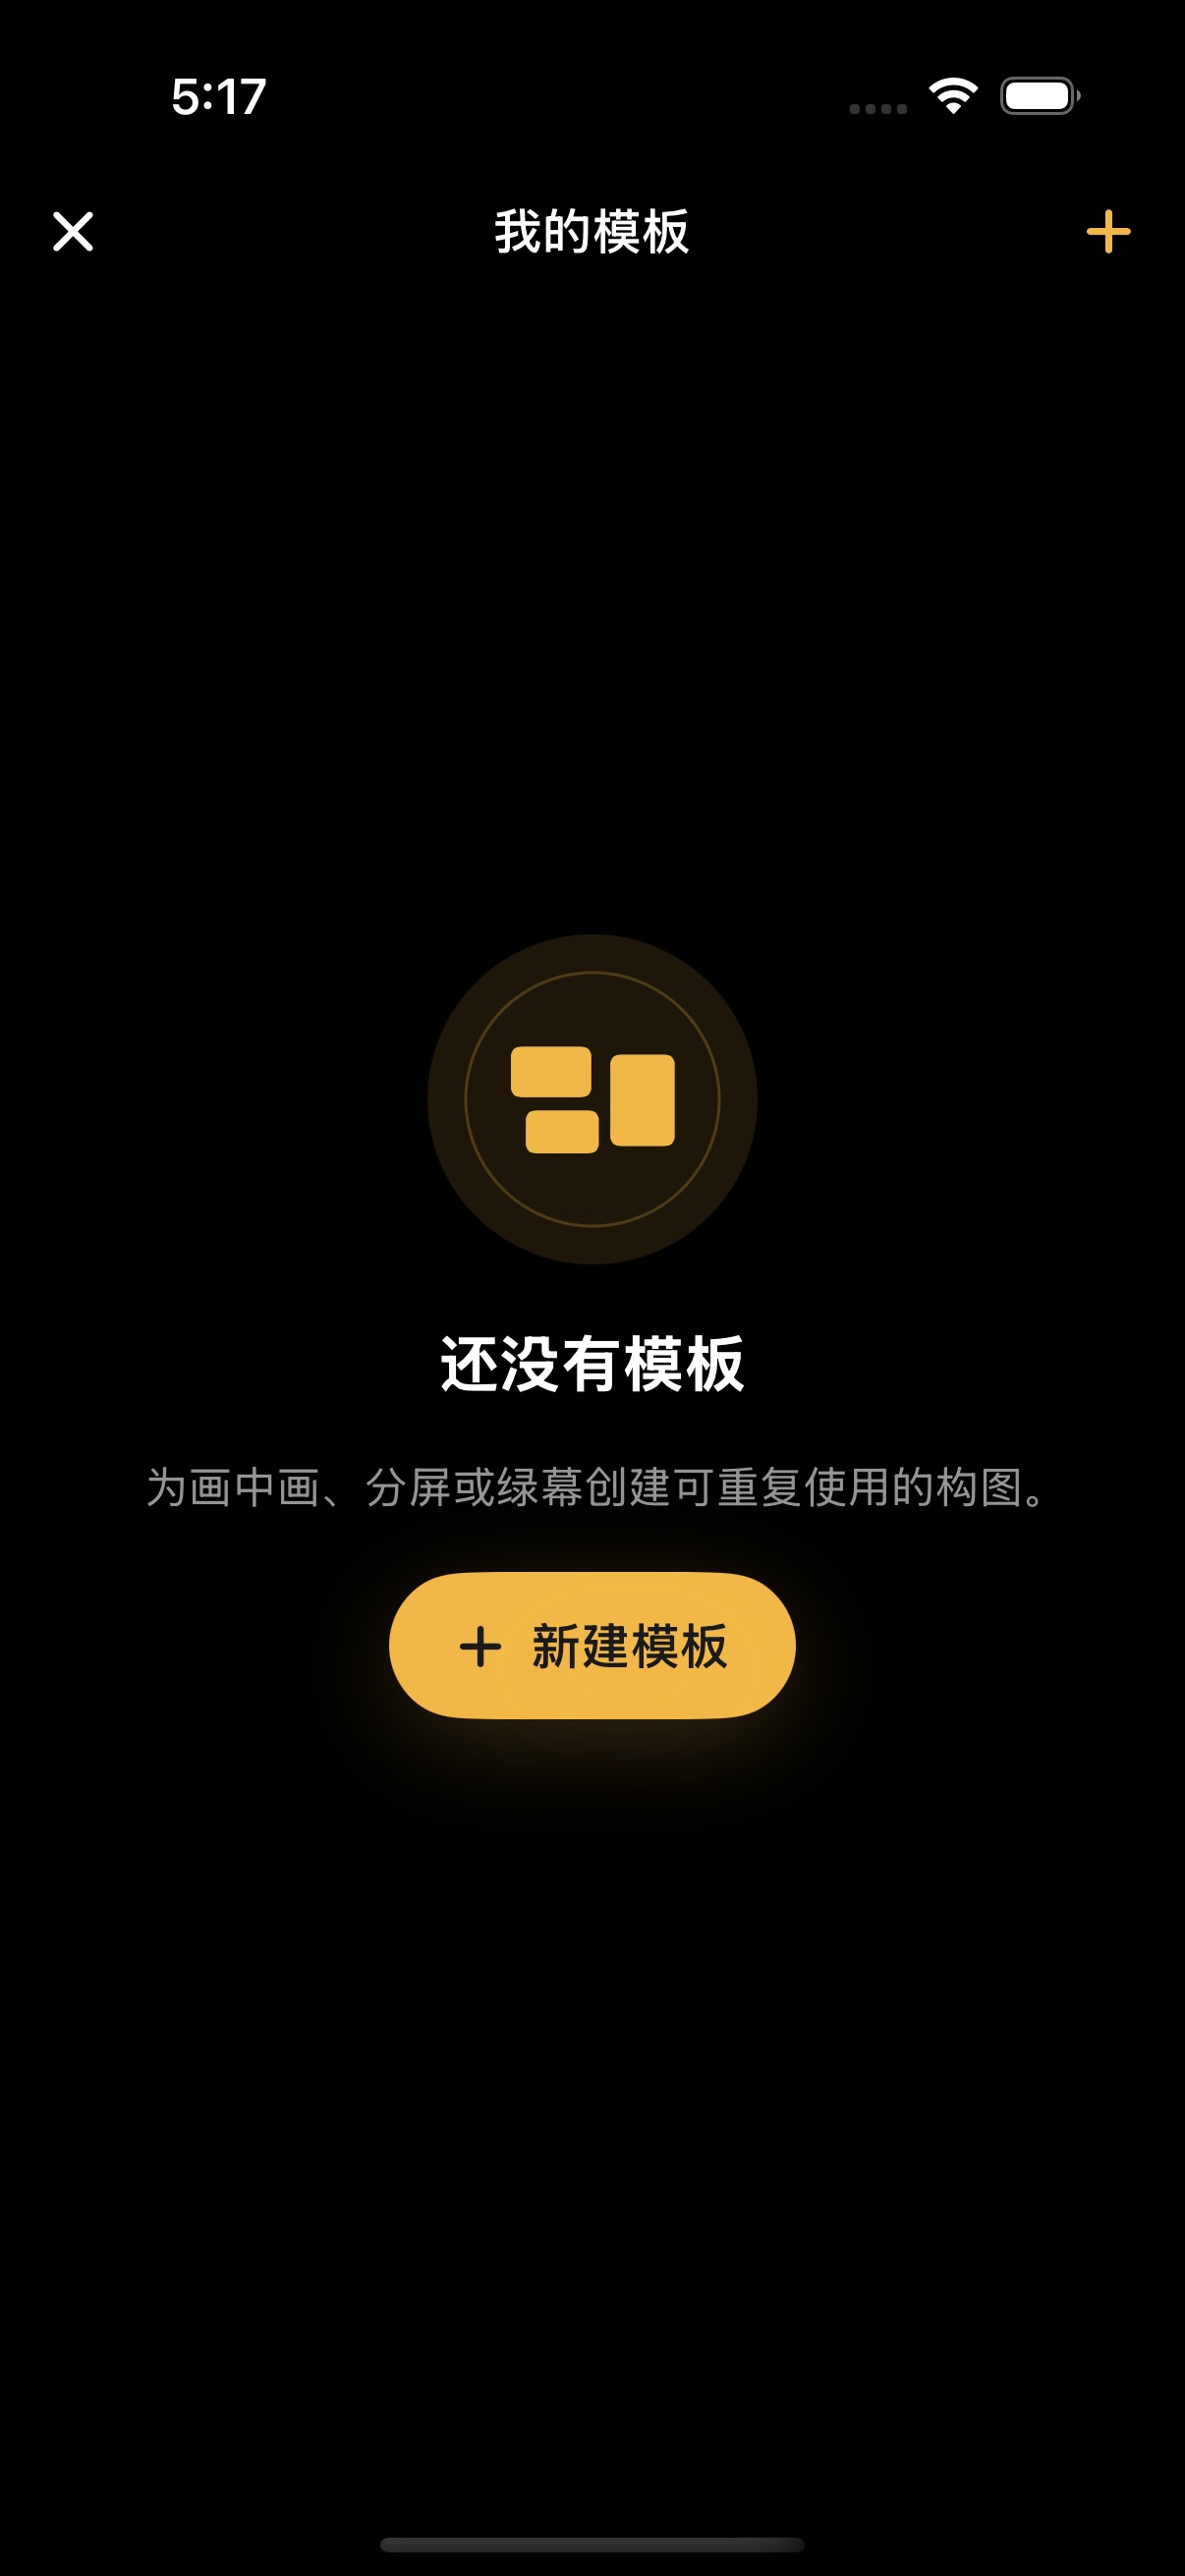
Tap + in the upper-right corner
The + button creates a template. When the list is empty, the large yellow button in the center opens the same screen.
- 1 +: new template
Open full-size screenshot ↗ STEP 03
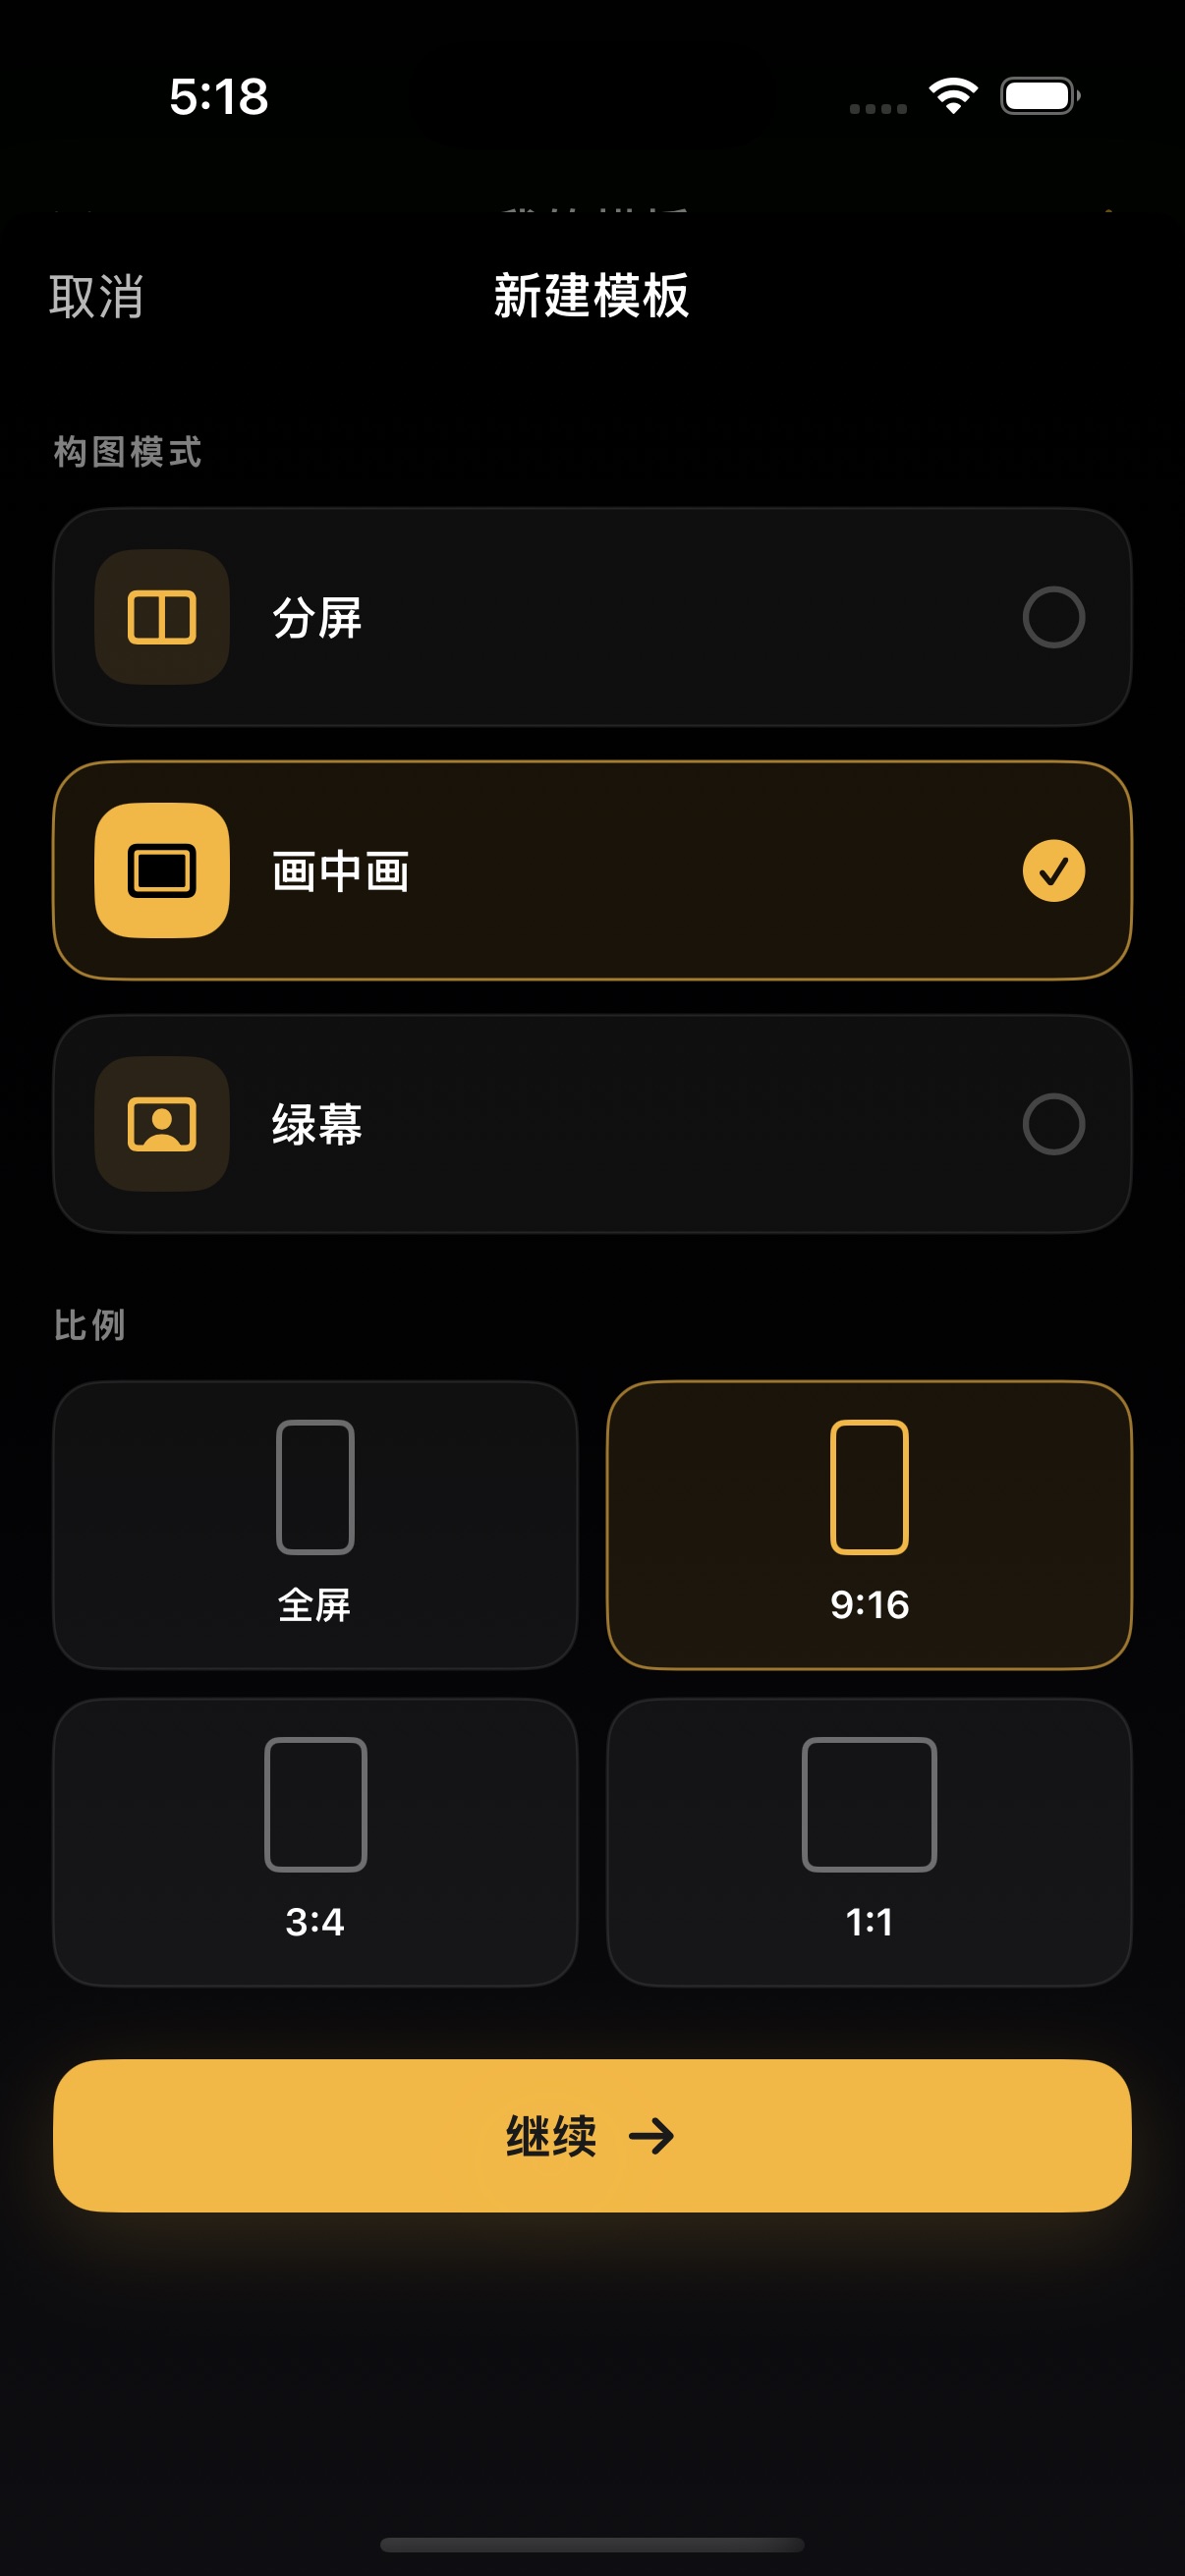
Choose Picture in Picture, then continue
Select the middle Picture in Picture card, choose an aspect ratio, then tap Continue at the bottom.
- 1 Picture in Picture: second card
- 2 Continue
Open full-size screenshot ↗ STEP 04
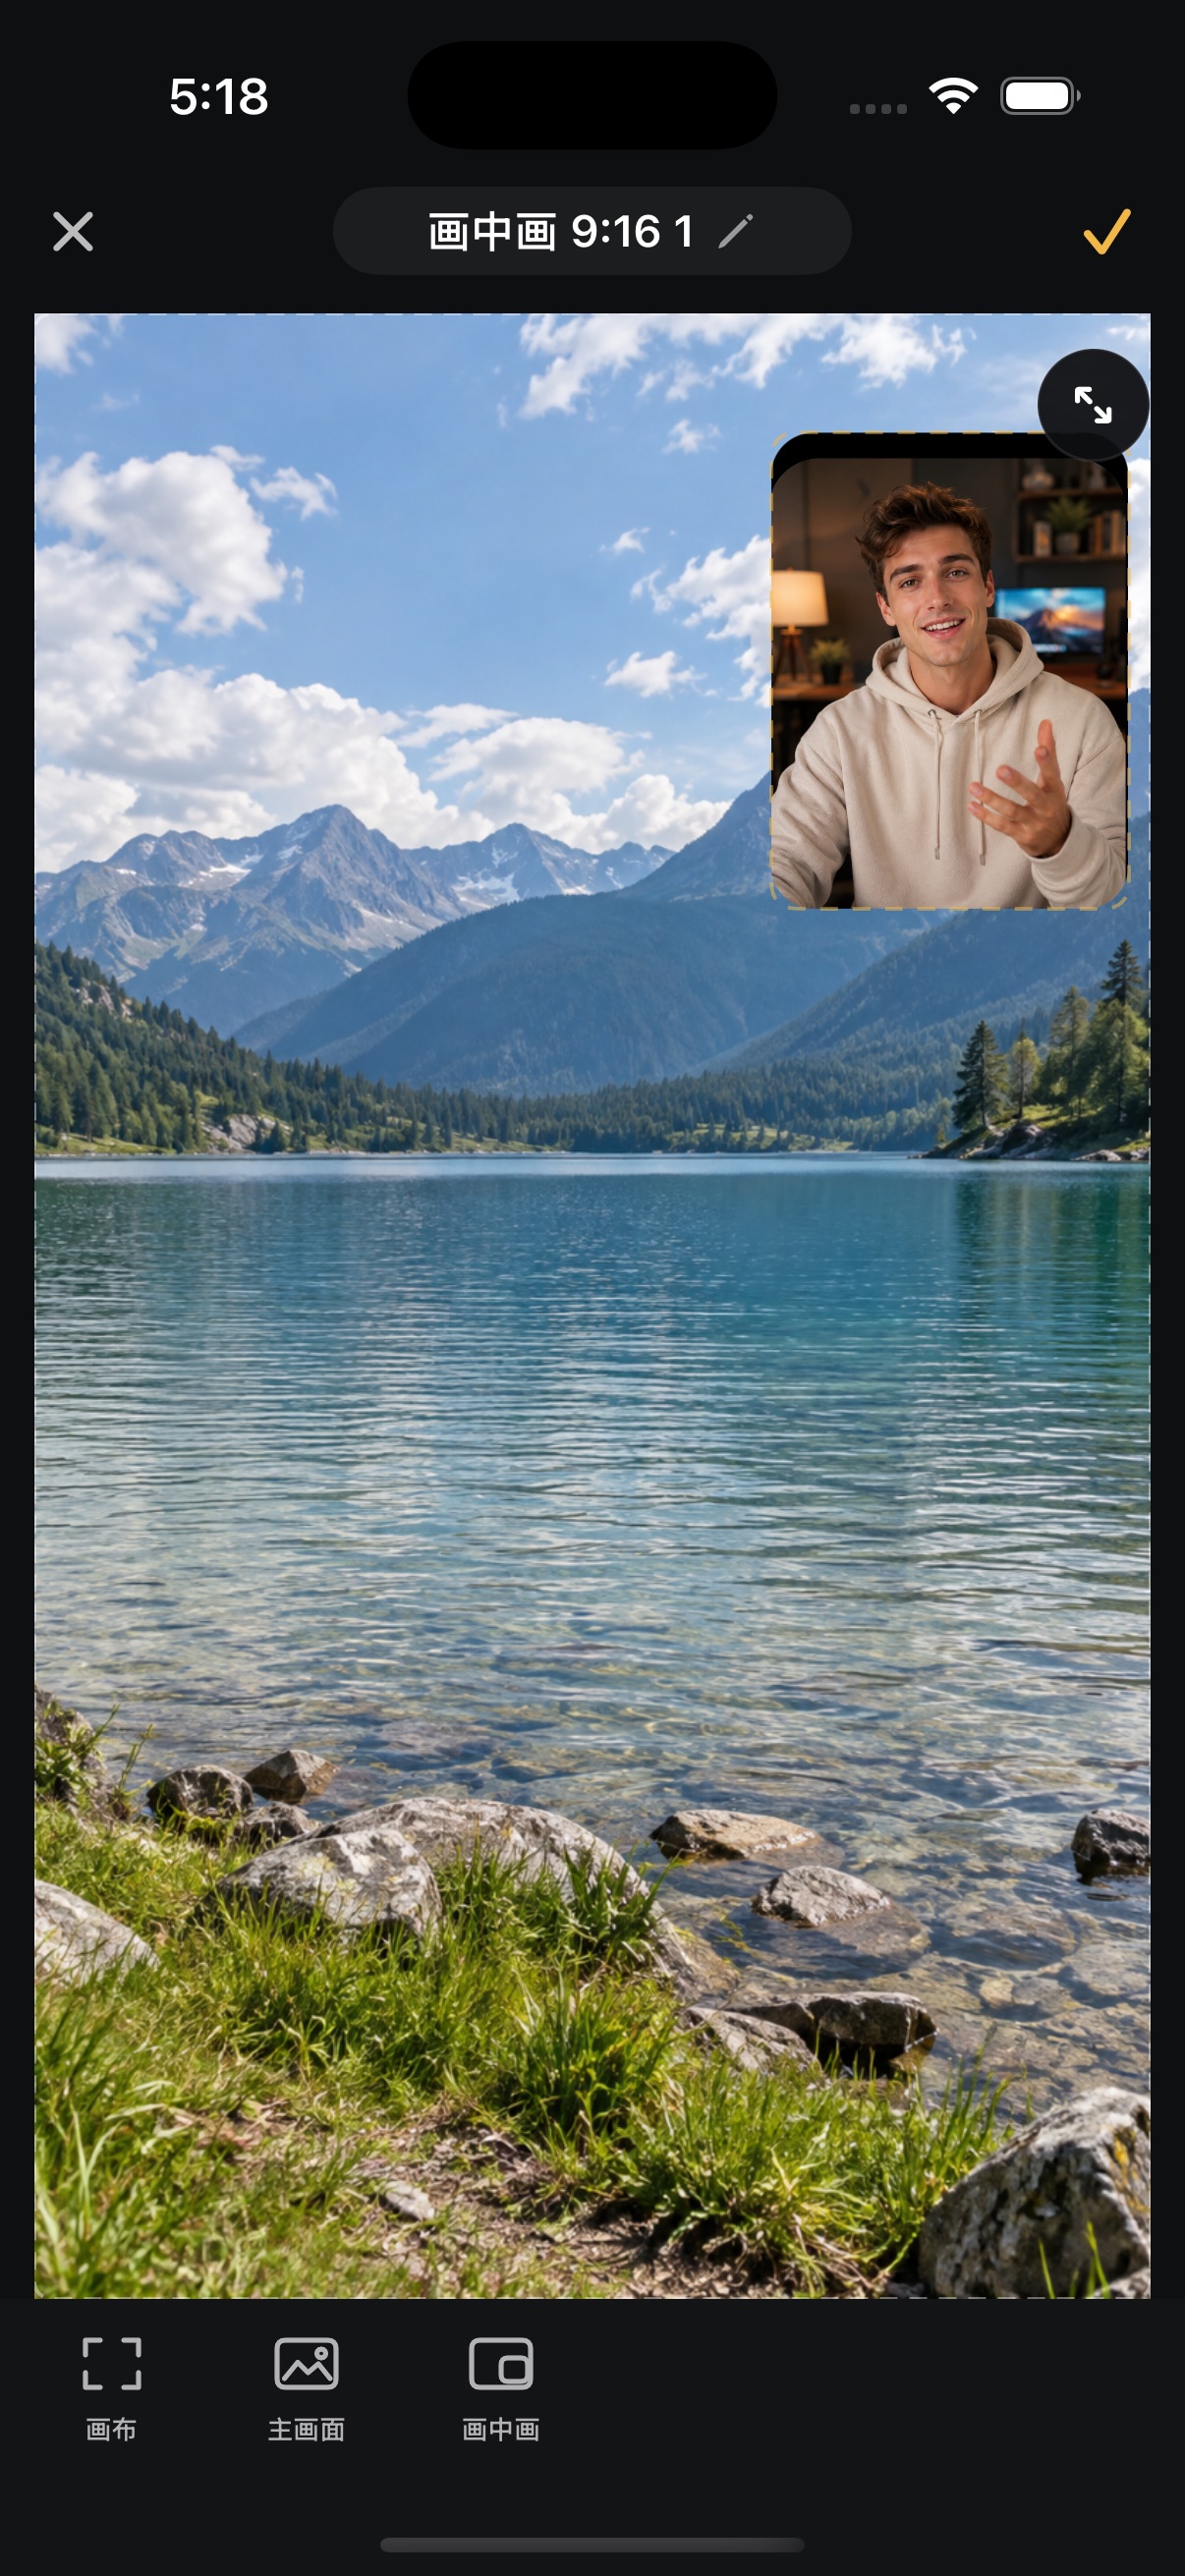
Tap the large-frame / small-frame icon
The third icon at the bottom selects the inset object and opens its shape and border controls.
- 1 Nested frames: edit the inset
Open full-size screenshot ↗ STEP 05
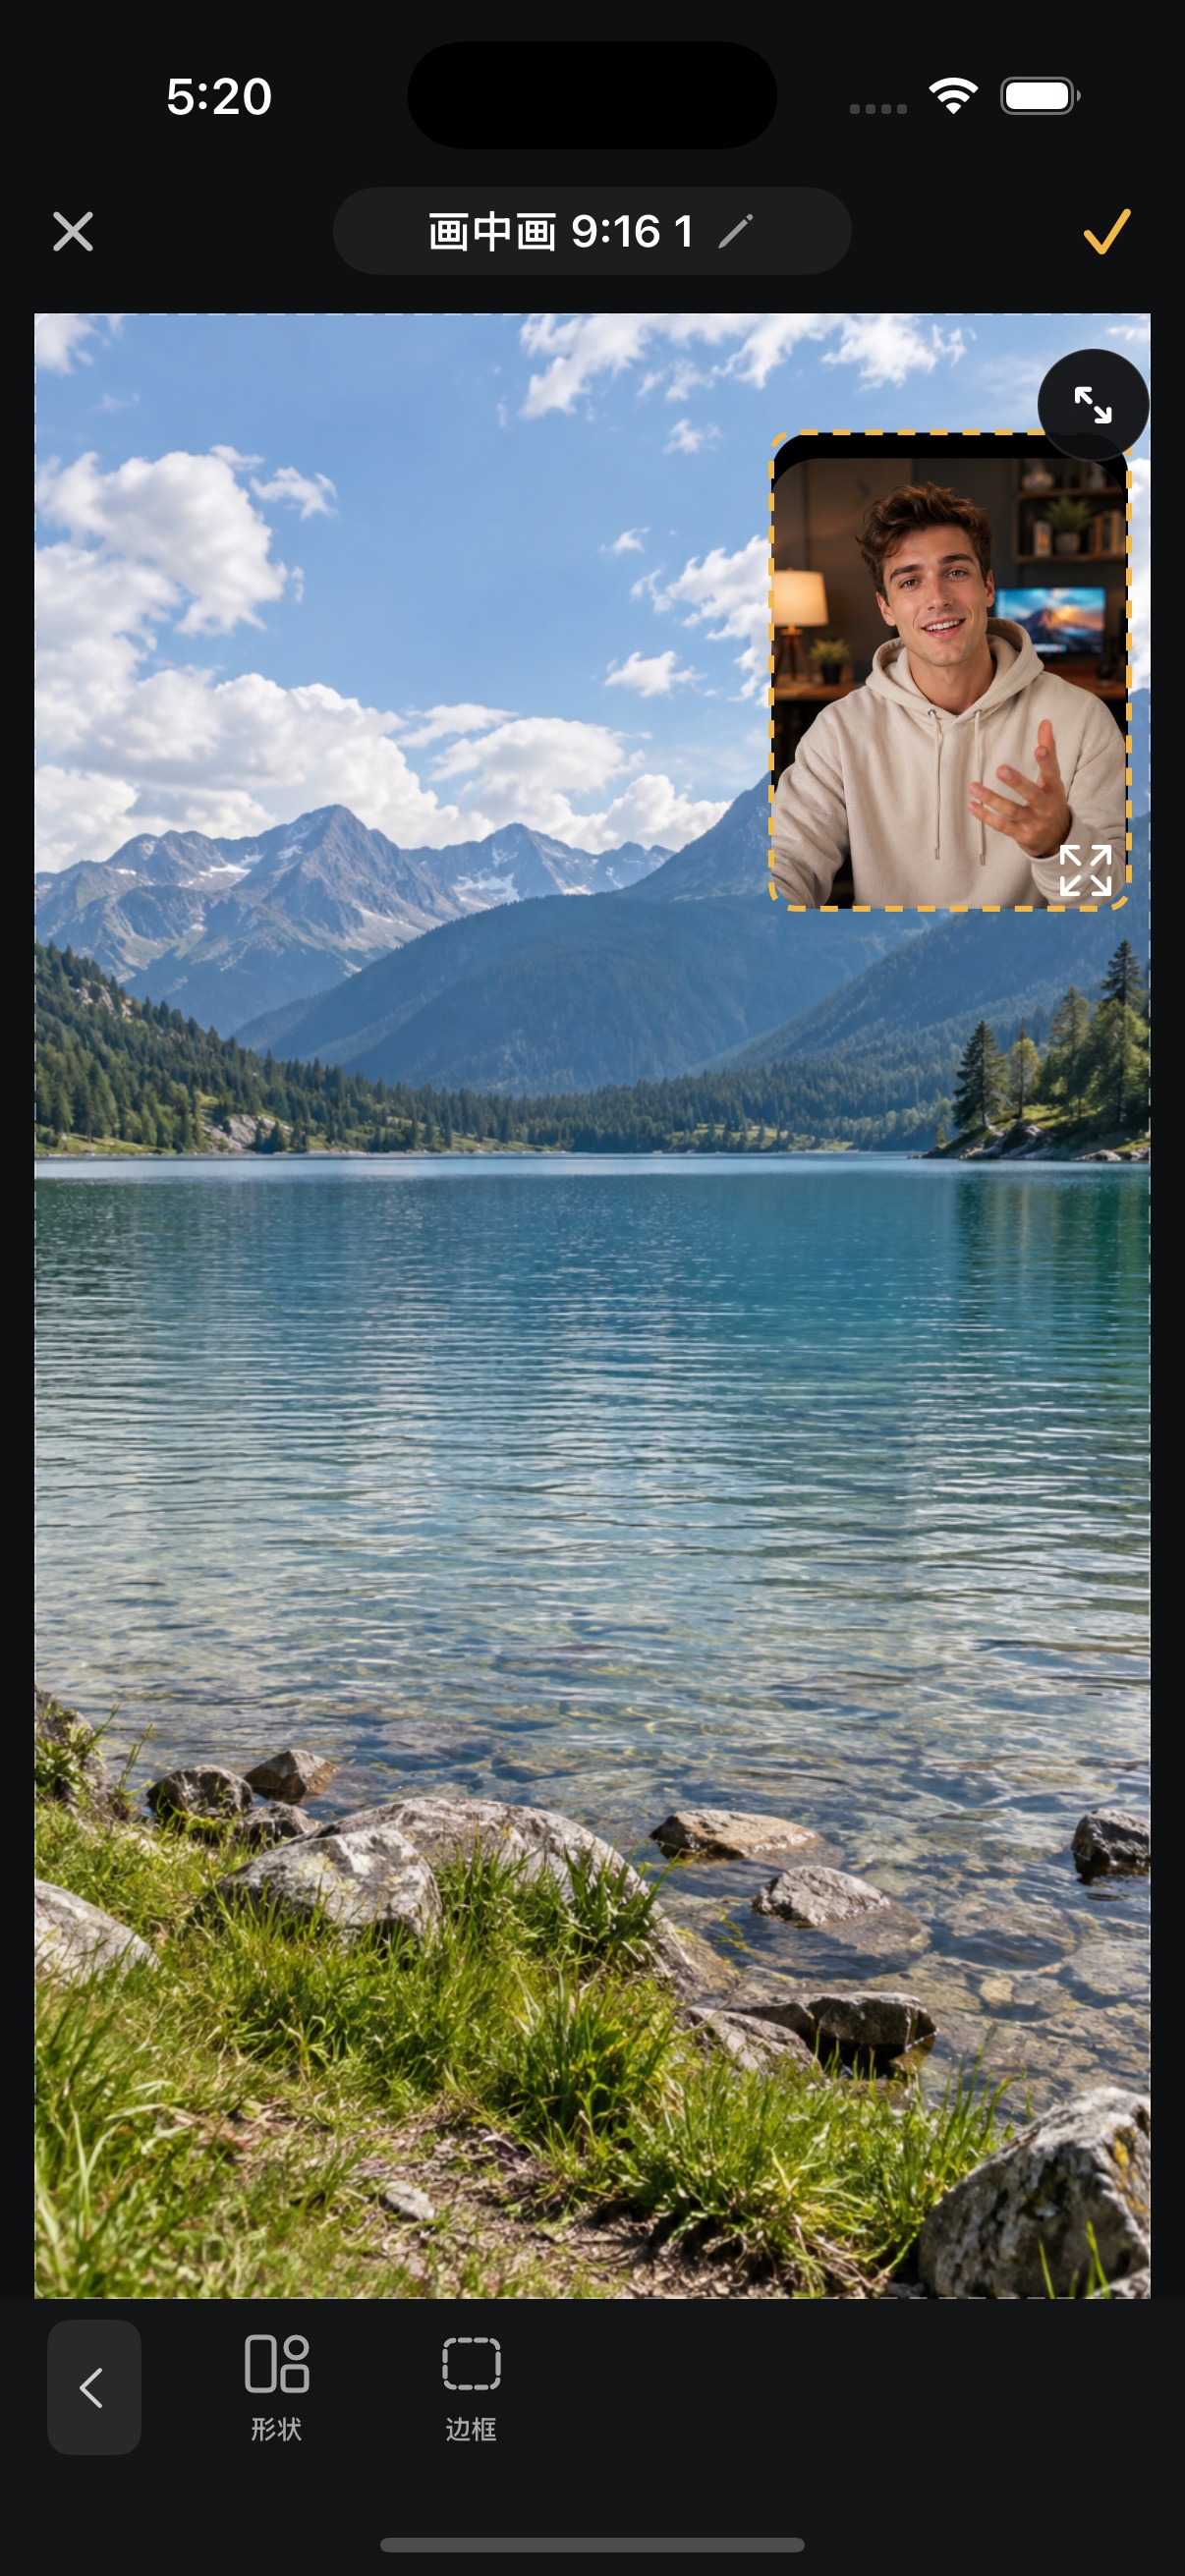
Find the inset editing tools
Shape combines a rectangle, a circle, and a square. Border uses a dashed frame. The diagonal arrows at the upper right expand the preview, where you can move and resize the inset.
- 1 Shape
- 2 Border
- 3 Diagonal arrows: expand preview
Open full-size screenshot ↗ STEP 06
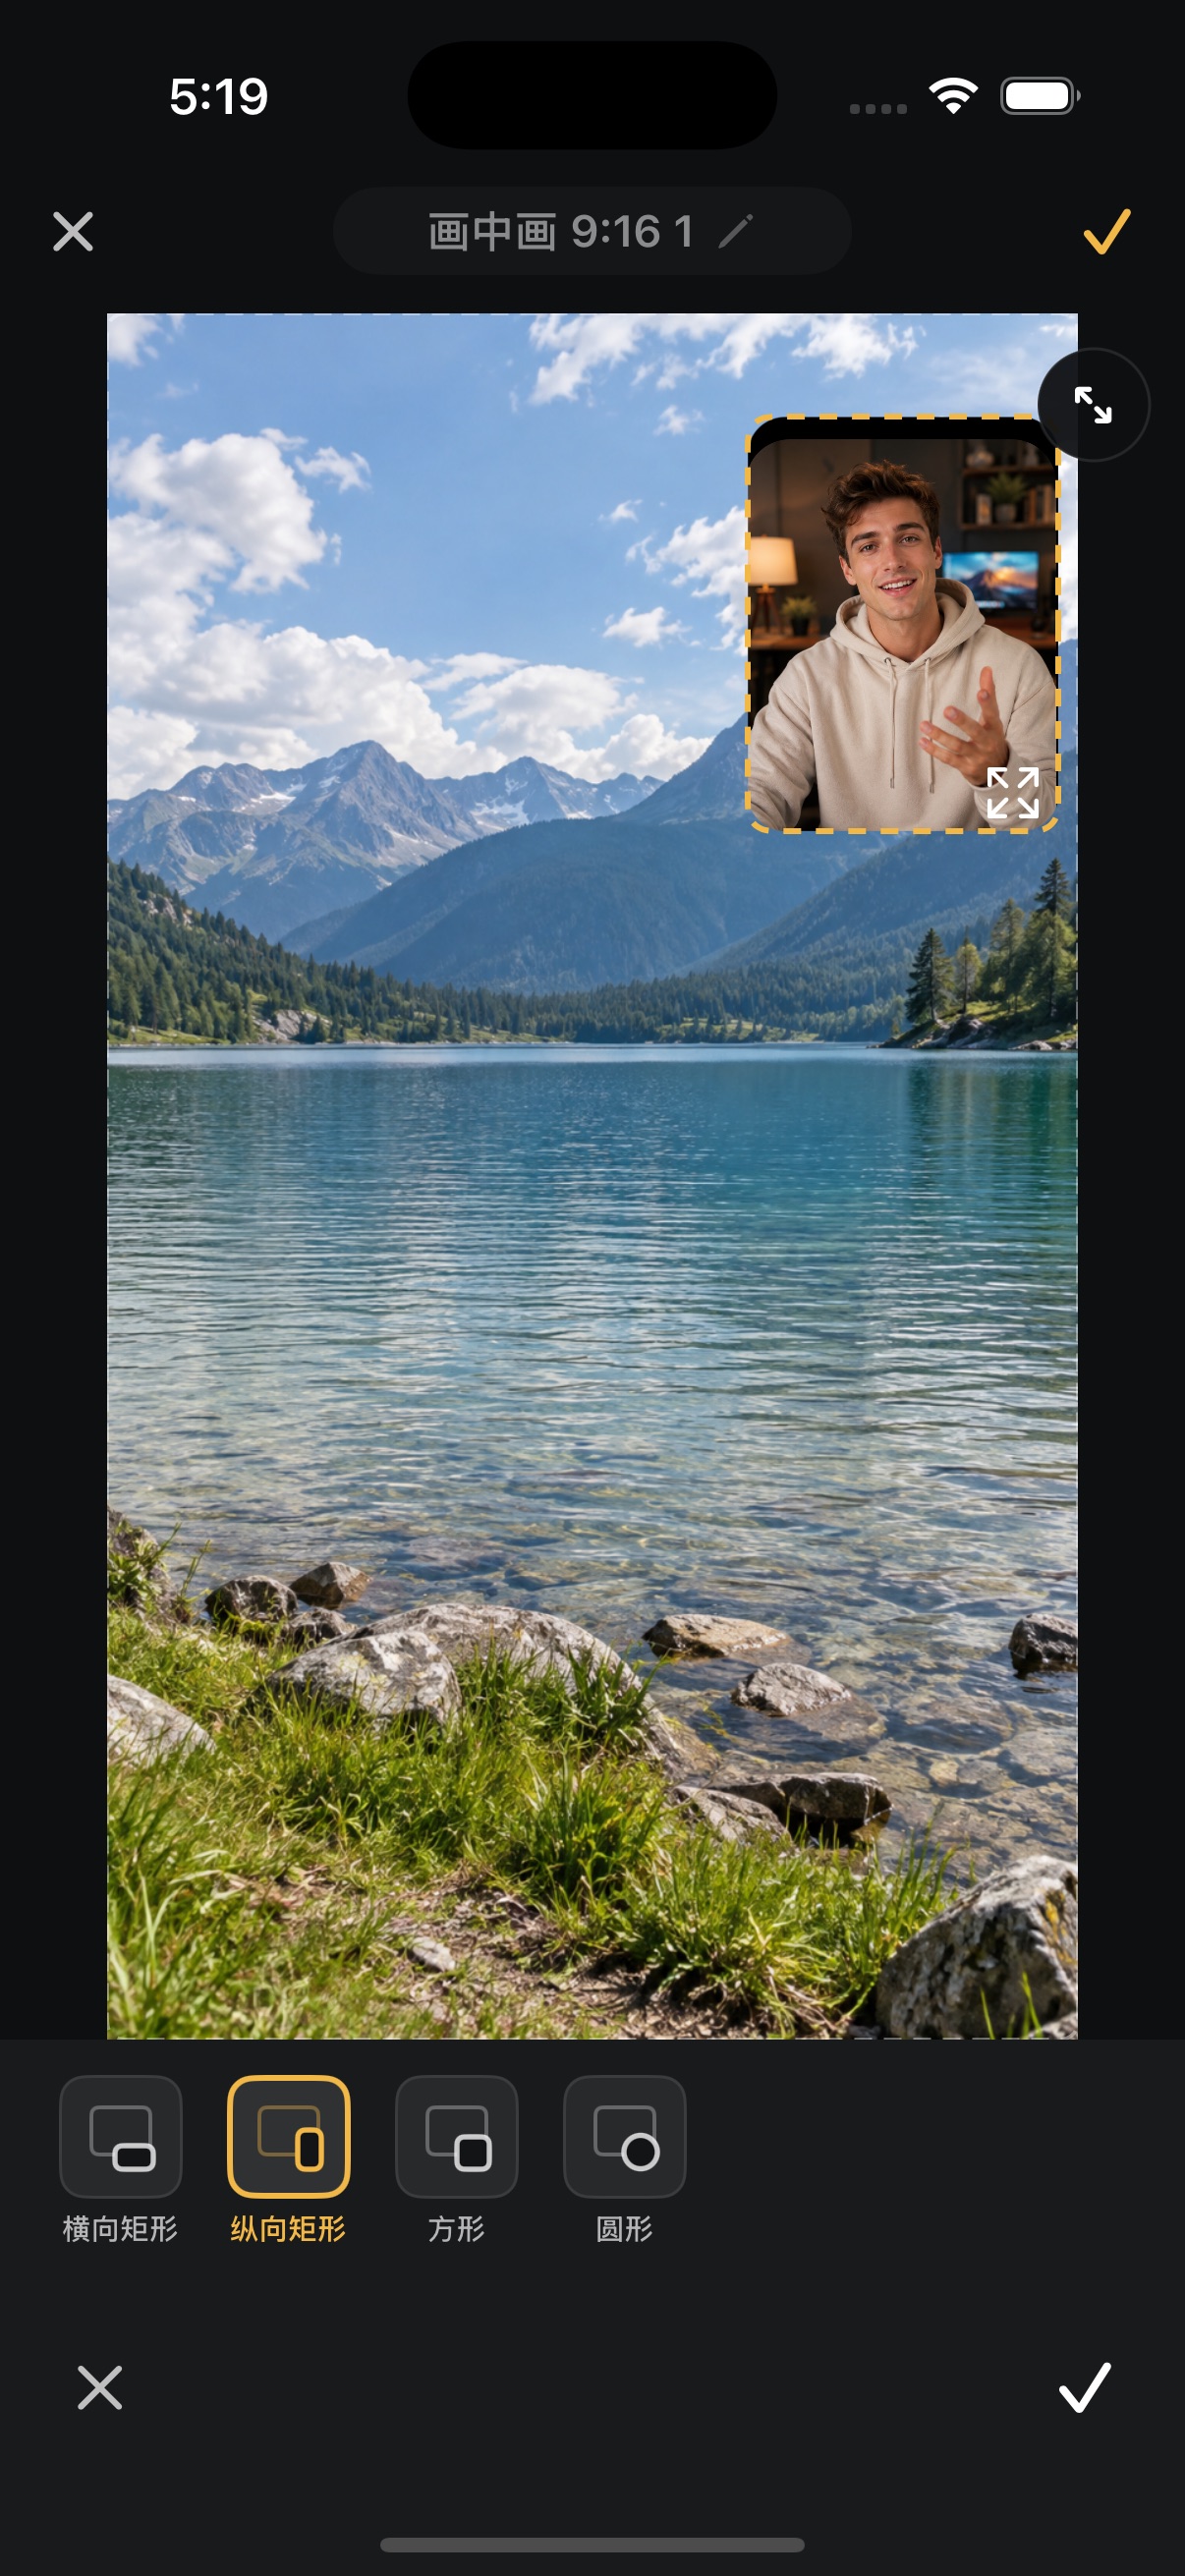
Choose a shape and confirm at the bottom
Vertical Rectangle is selected here. Tap another shape to switch, then tap the white checkmark at the bottom right to confirm.
- 1 Vertical Rectangle
- 2 White checkmark: confirm setting
Open full-size screenshot ↗ STEP 07
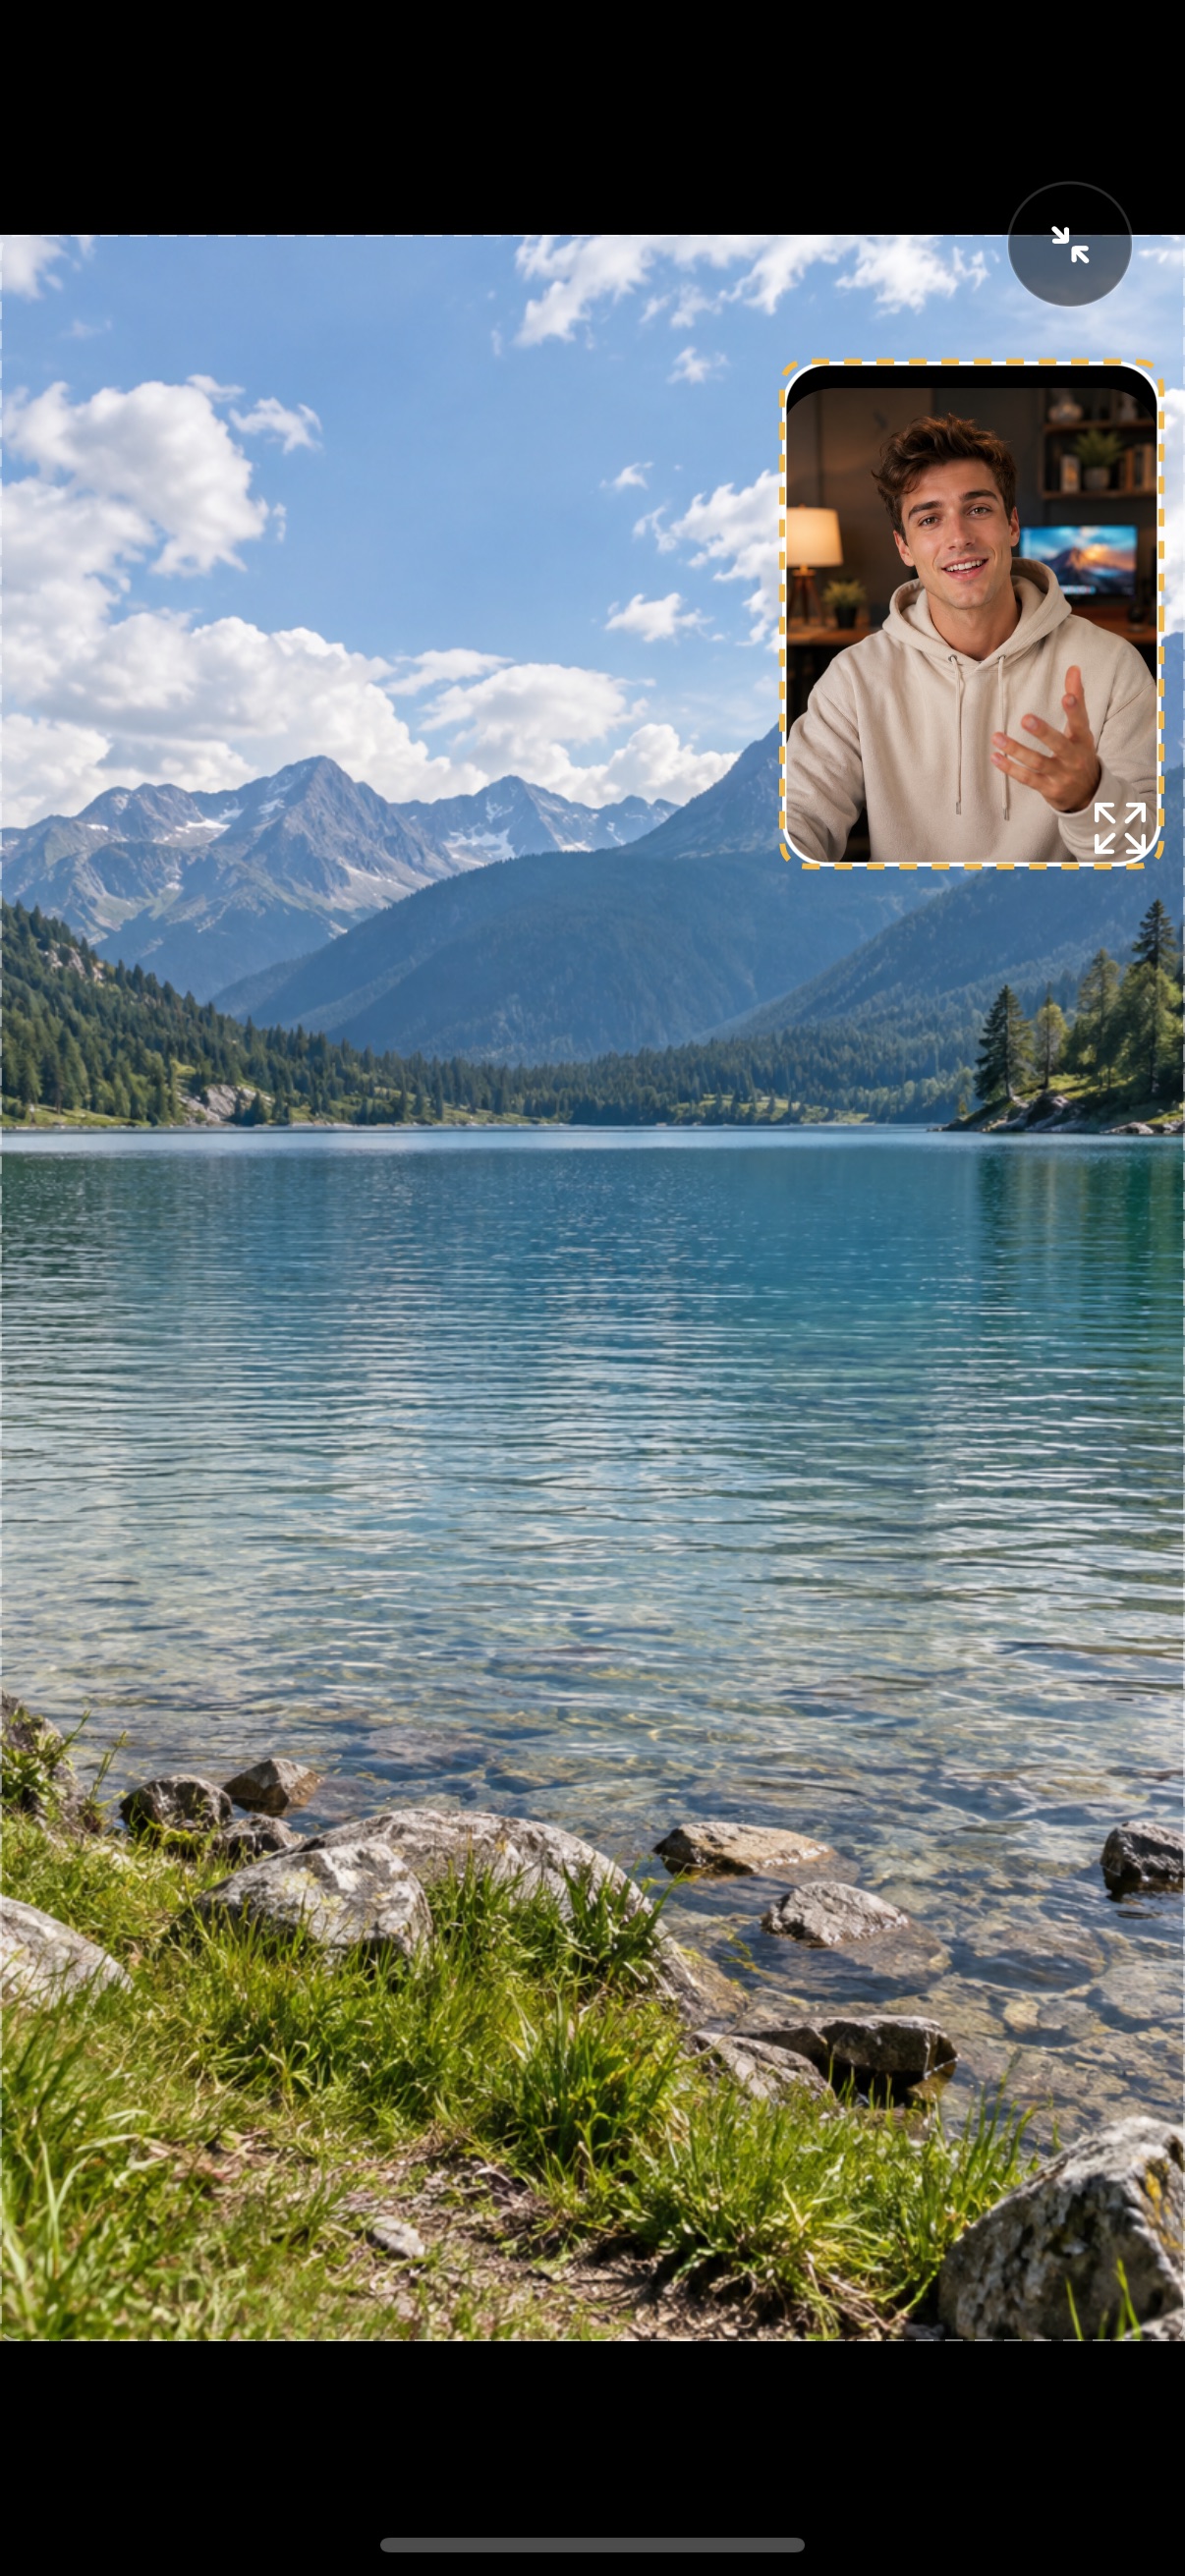
Drag the inset to move; drag its corner to resize
Use the diagonal arrows at the upper right of the editor preview to expand it. Select the inset, drag inside it to move it, or drag the four-arrow handle at its lower-right corner to resize. The inward arrows at the top return to the editor.
- 1 Drag inside to move
- 2 Drag the corner to resize
Arrows show gesture direction on a still screenshot, not a live recording.
Open full-size screenshot ↗ STEP 08
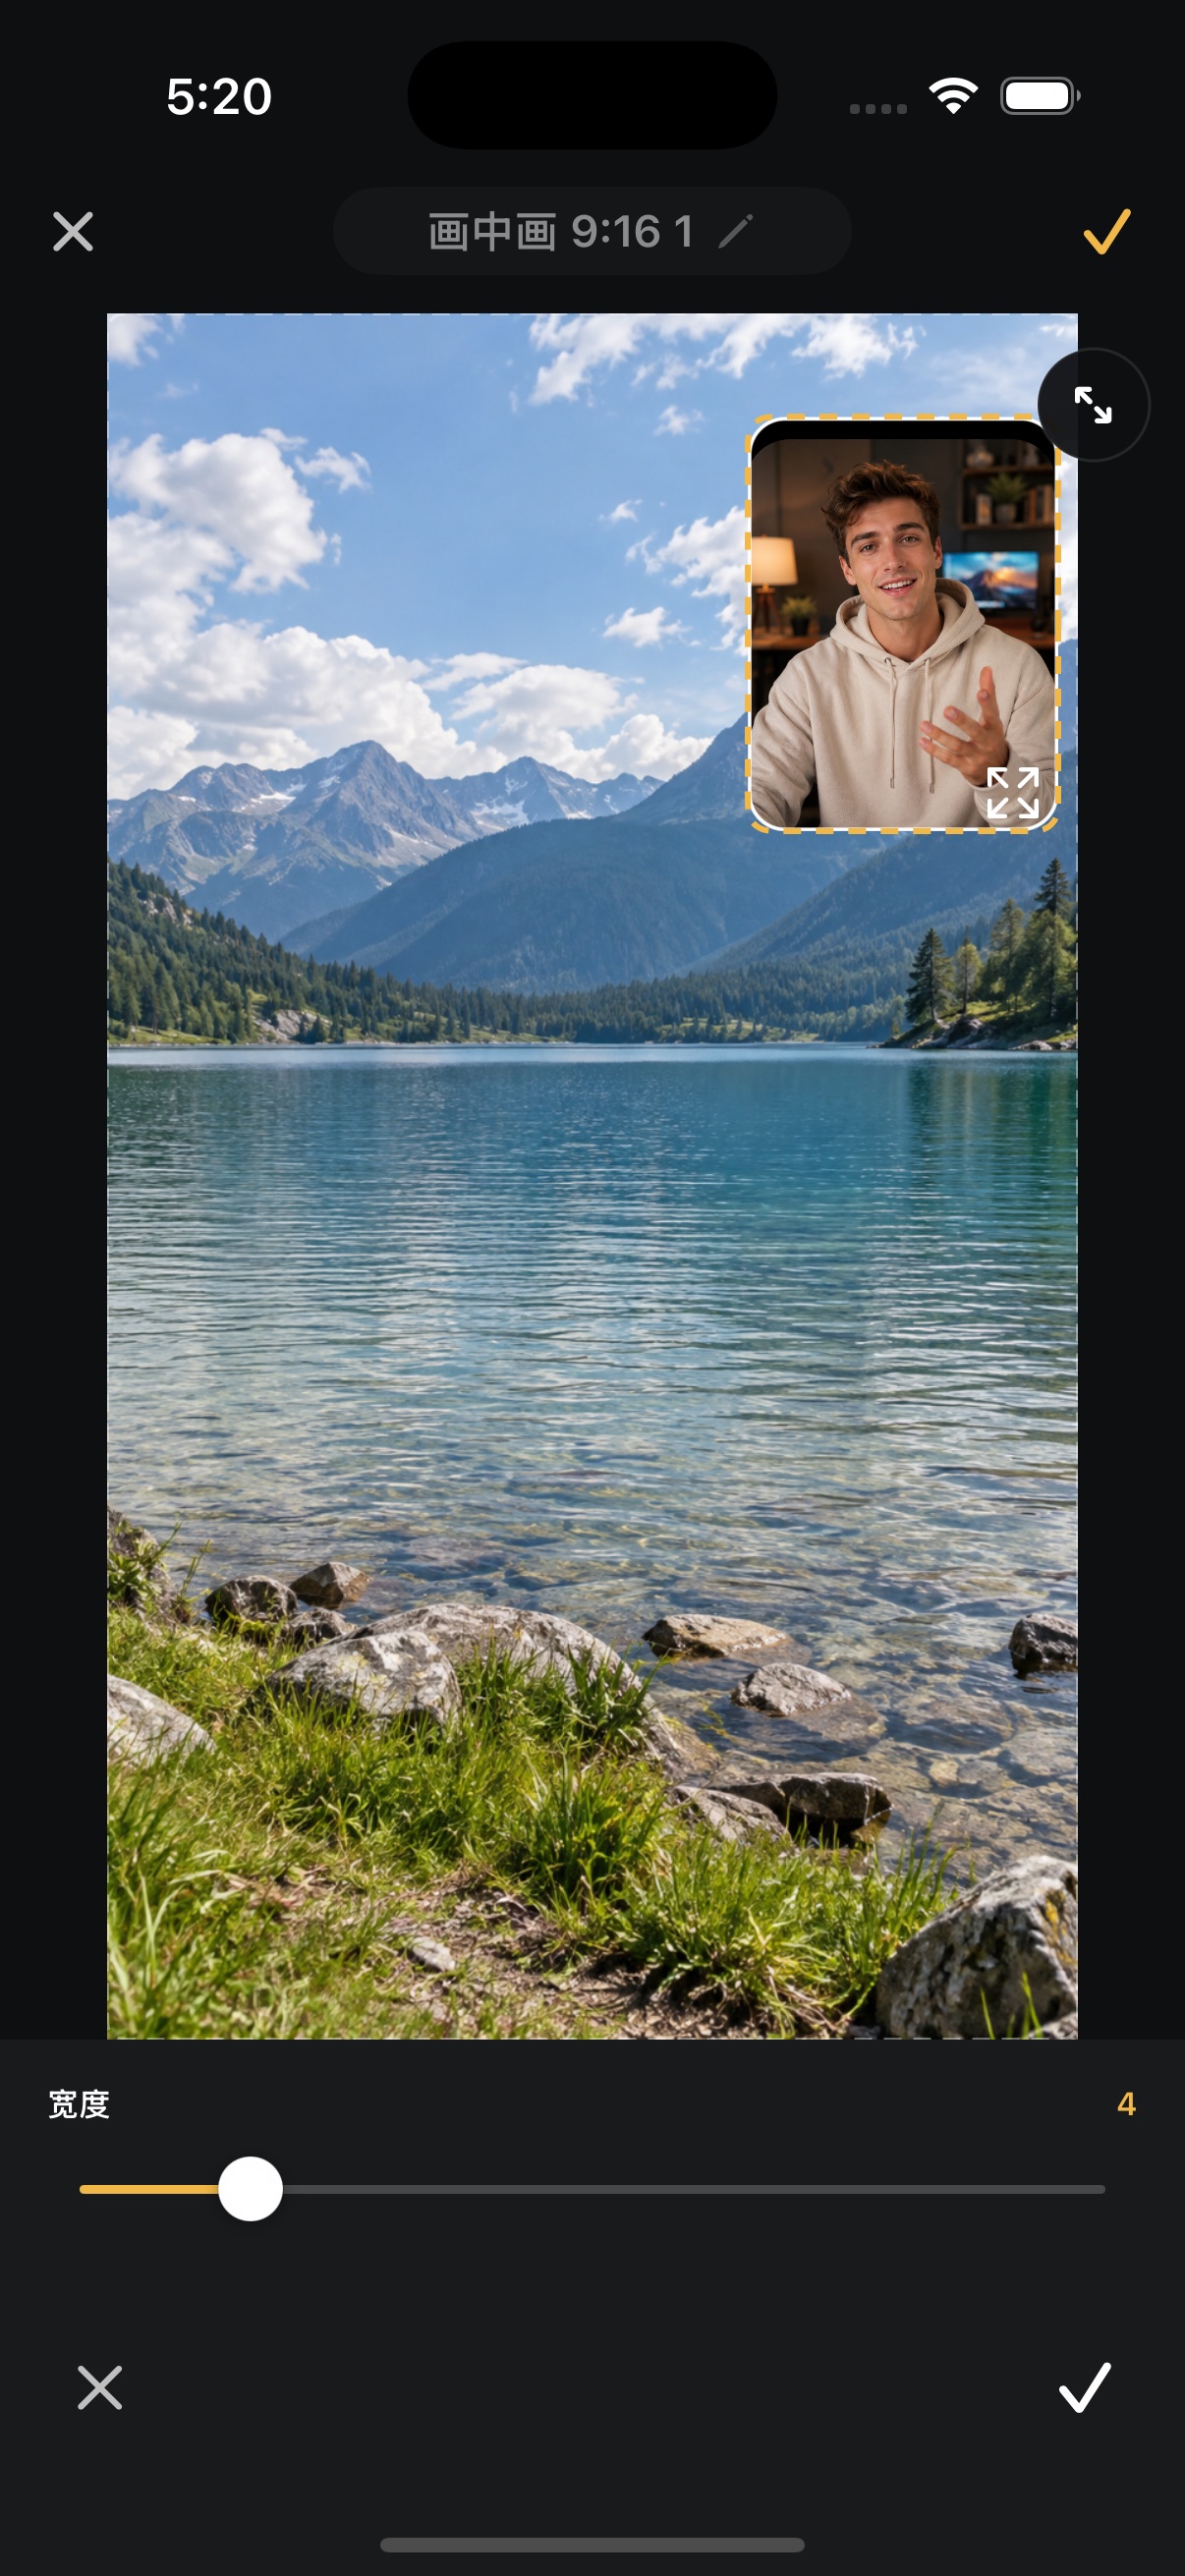
Drag the border-width slider, then confirm
Return to the regular editor, open the dashed-frame Border control, then Width. Drag the white knob to change the width and confirm with the white checkmark at the bottom right.
- 1 Drag the white knob
- 2 Confirm border width
Open full-size screenshot ↗ STEP 09
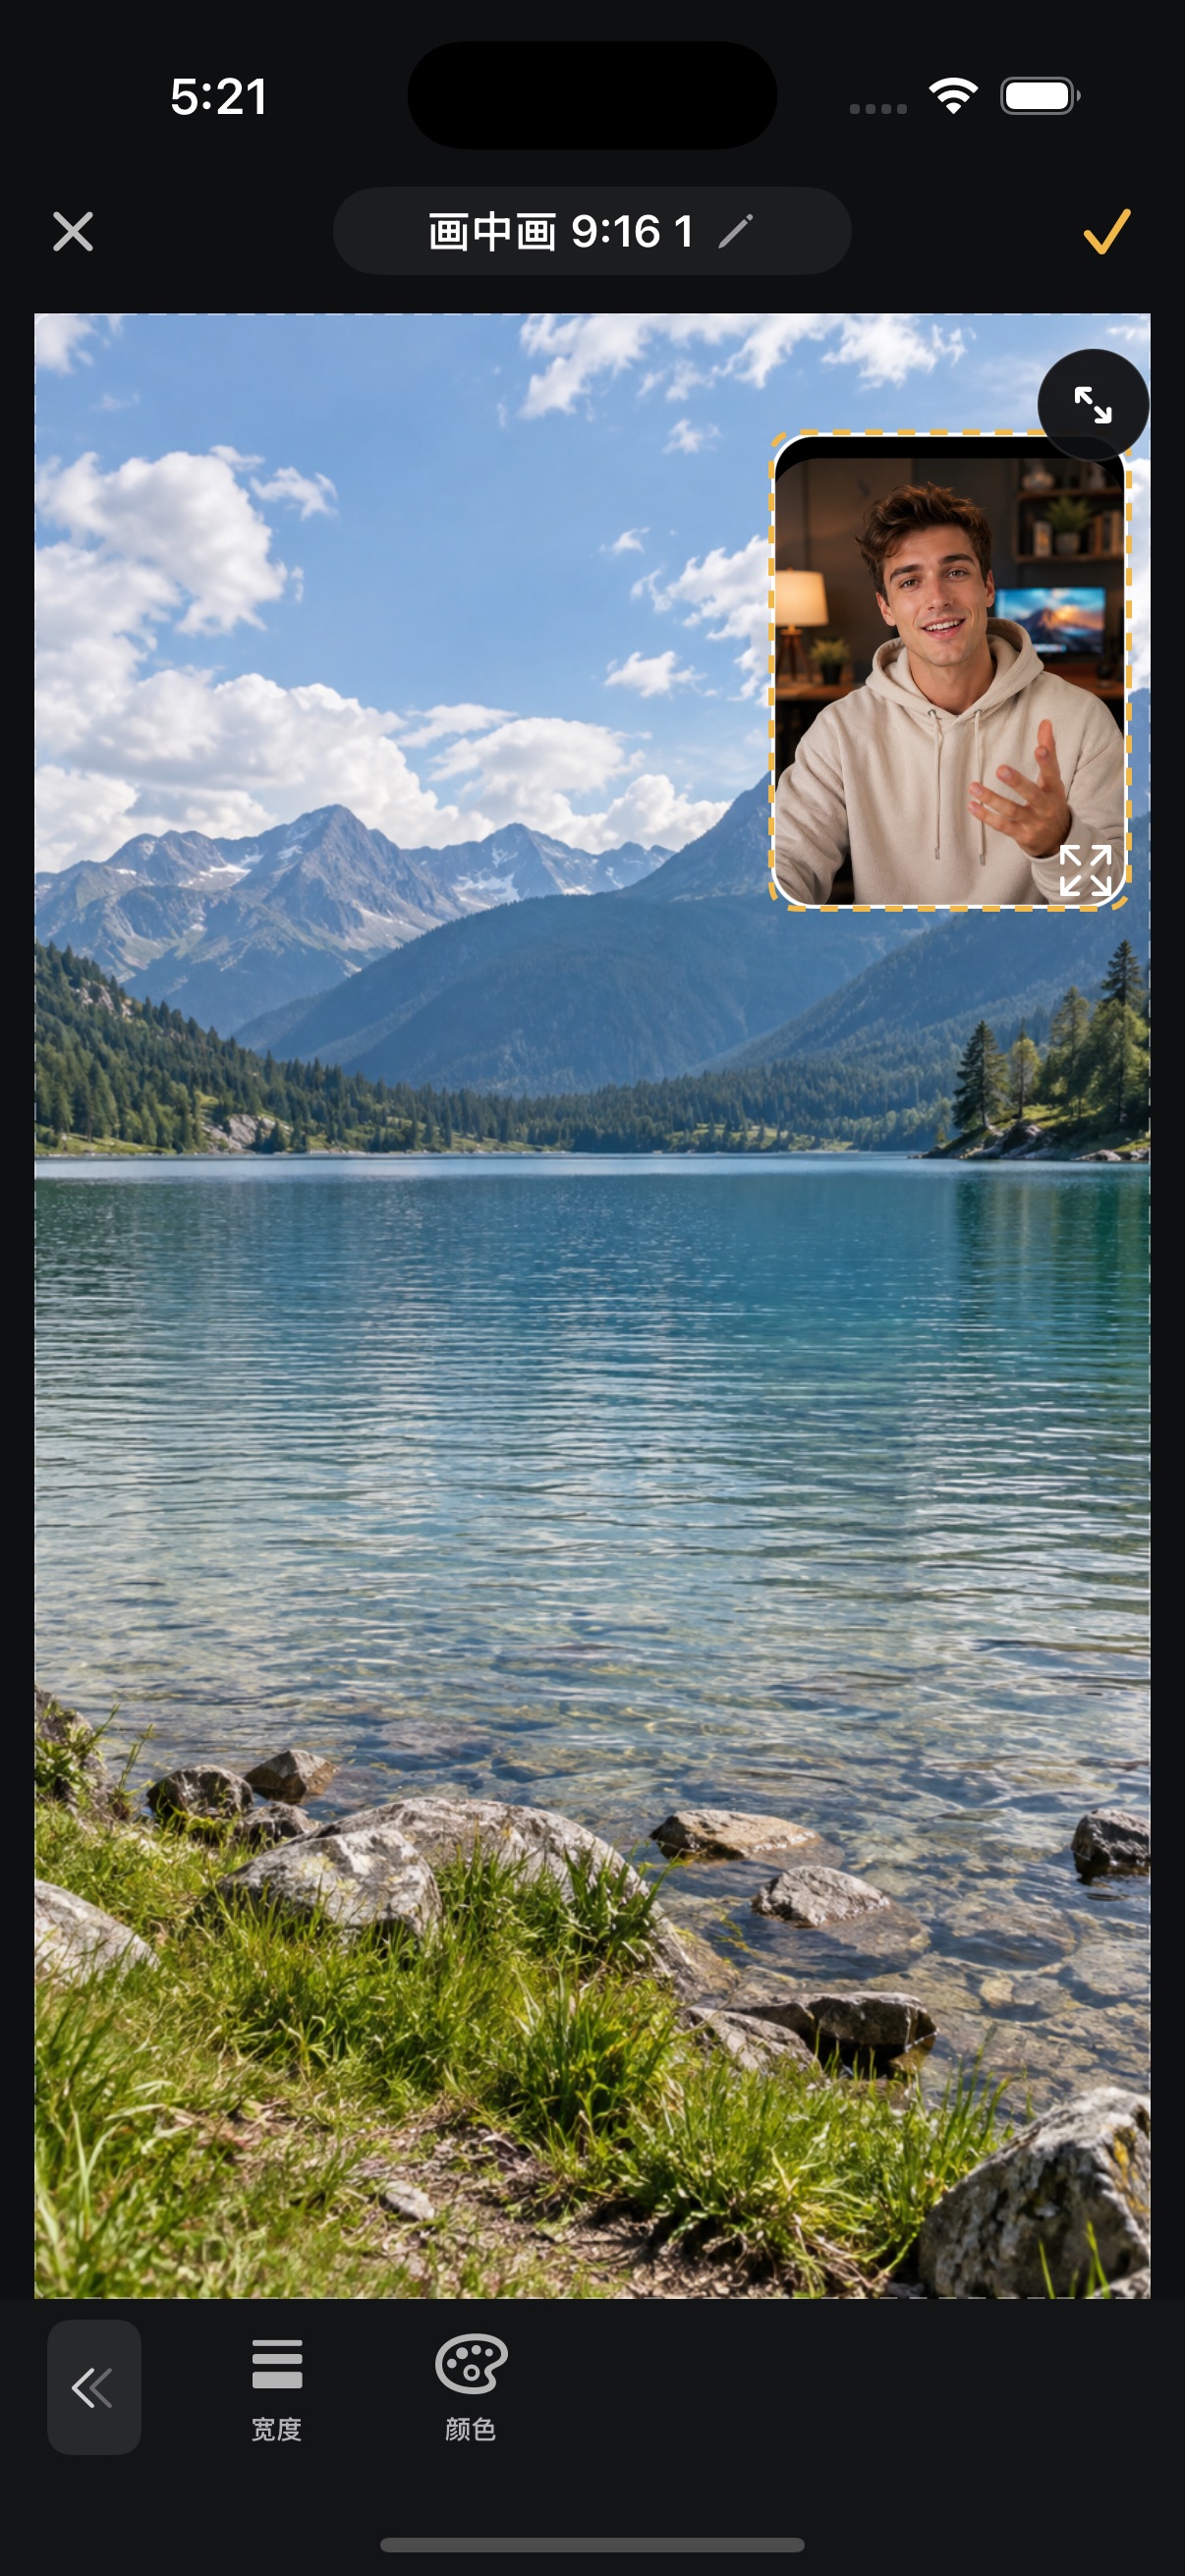
Finish with the yellow checkmark at the top
Confirm any open setting panel first. Then tap the yellow checkmark at the upper right to save the whole template. The white checkmark at the bottom only confirms one setting.
- 1 Yellow checkmark: save template
Open full-size screenshot ↗ STEP 10
Return to the camera and tap the red record button
After saving, return to the camera and check that your composition is applied. Tap the red circle to record. If you are still in My Templates, apply the saved template and use × at the upper left to return.
- 1 Red circle: start recording
Open full-size screenshot ↗
Common questions
The inset covers something important. What should I change?
Move it into an unused part of the scene or shrink it with its corner resize handle. Check both views again if either subject moves during recording.
Where are the controls in expanded preview?
Tap the object you want to select in the preview. Return to the regular template editor for detailed controls.